Monday, August 31, 2015
Pirate Ship Fruit Bowl.
Having friends coming over is always a blast, and it is always nice to make a healthy and fun dessert.
This time I had a small watermelon, and I wanted to turn into a pirate ship.
 I cut the top and scooped the inside using my melon baller.
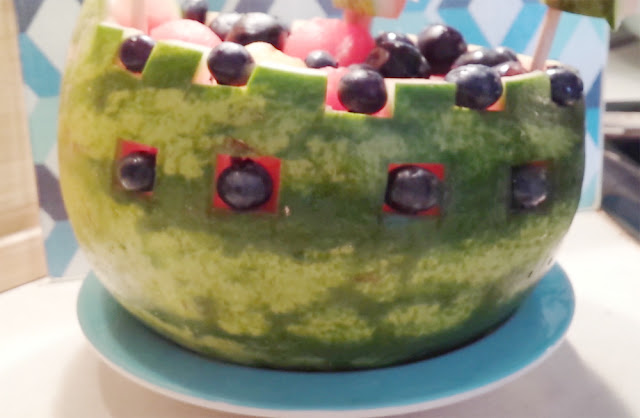
 Next I made little square windows,and placed blueberries for fake canons.
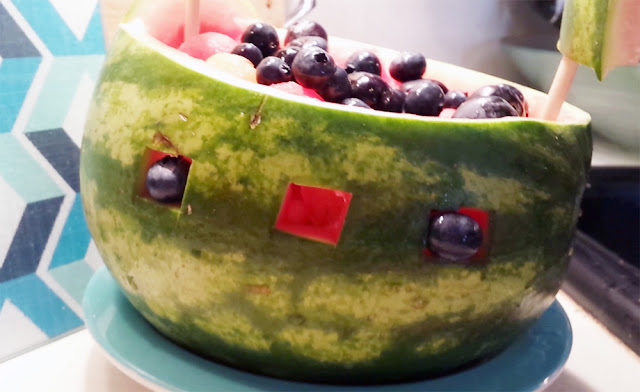 And cut more details to add more details.
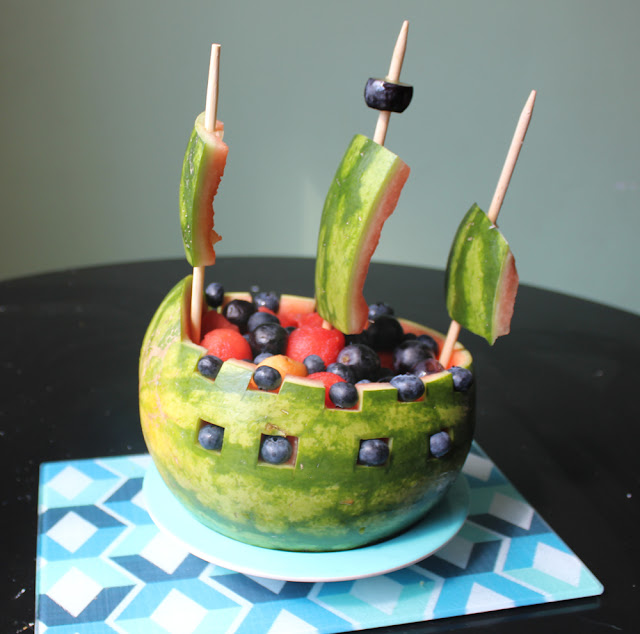
 Using the top part of the watermelon, I cut the sails.
 For the masts I used large skewers.
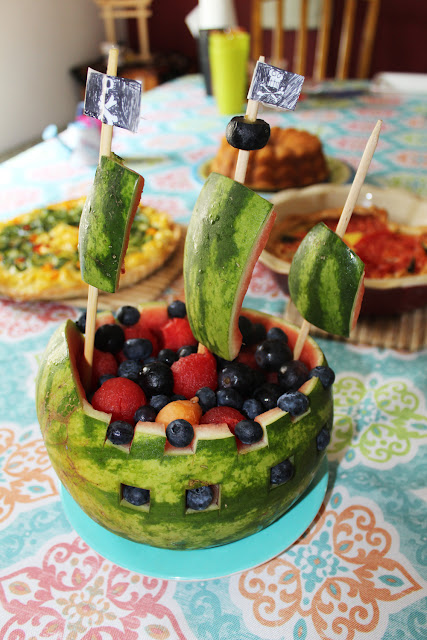
 And for the final touch the kids made the pirate flags.
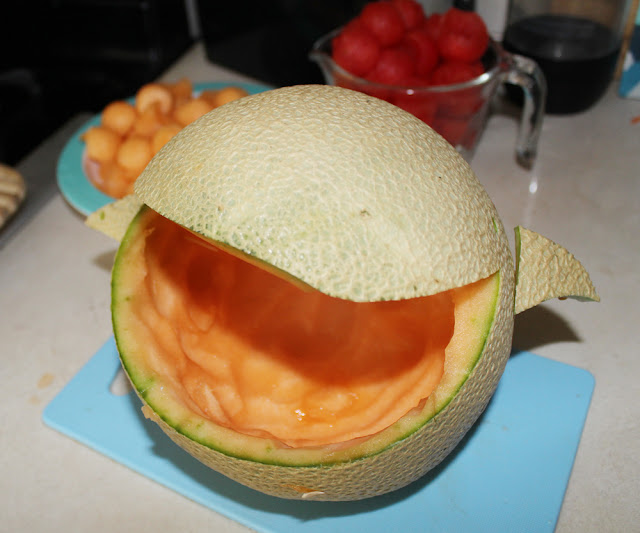
 I also had a cantaloupe, that turned into a whale.
 First I cut a slice on the bottom, so the fruit can stand and won't roll around.
Then I cut a big smile and scooped the inside with a melon baller.
The corners of the smile where used to make his flippers (attached with toothpicks).
First I cut a slice on the bottom, so the fruit can stand and won't roll around.
Then I cut a big smile and scooped the inside with a melon baller.
The corners of the smile where used to make his flippers (attached with toothpicks).
 I cut a large black grape and a blueberry to make the eyes.
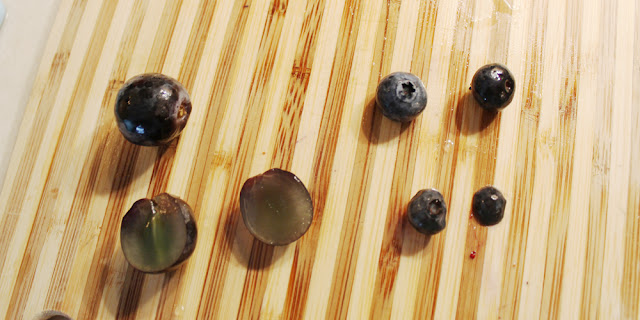 Using the melon baller, I scooped two small holes to fit the grapes for the eyes.
 And last I filled with fruit.
 They looked well together, even though my son thought the whale was Pac Man.
 Which also gave me another idea...

 I cut the top and scooped the inside using my melon baller.
 Next I made little square windows,and placed blueberries for fake canons.
 And cut more details to add more details.
 Using the top part of the watermelon, I cut the sails.
 For the masts I used large skewers.
 And for the final touch the kids made the pirate flags.
 I also had a cantaloupe, that turned into a whale.
 First I cut a slice on the bottom, so the fruit can stand and won't roll around.
Then I cut a big smile and scooped the inside with a melon baller.
The corners of the smile where used to make his flippers (attached with toothpicks).
First I cut a slice on the bottom, so the fruit can stand and won't roll around.
Then I cut a big smile and scooped the inside with a melon baller.
The corners of the smile where used to make his flippers (attached with toothpicks).
 I cut a large black grape and a blueberry to make the eyes.
 Using the melon baller, I scooped two small holes to fit the grapes for the eyes.
 And last I filled with fruit.
 They looked well together, even though my son thought the whale was Pac Man.
 Which also gave me another idea...

Thursday, August 27, 2015
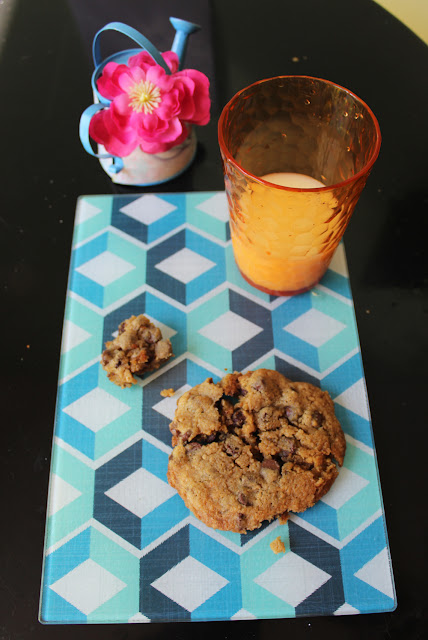
Cheerios Chocolate Chip Cookies.
There is always a time when you regret buying something wholesale, because nobody else wants to eat it anymore.
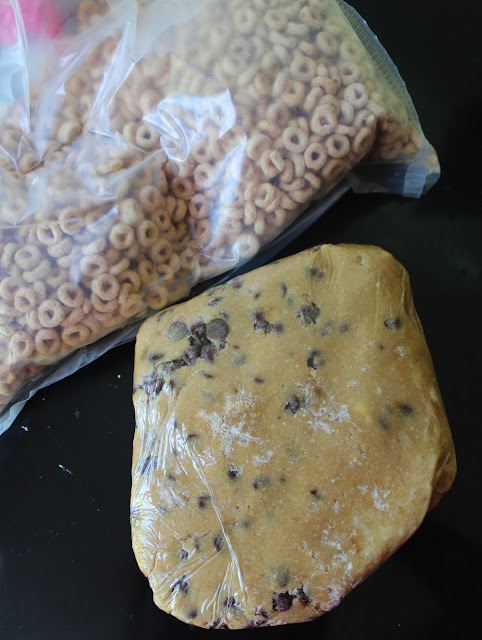
So I was stuck with a giant box of Cheerios, that was already opened so I couldn't donate.
That is when I decided to use it like a flour for cooking, and put everything in the blender.
Just when I thought I was being very original, I took a look on the Cheerios website, and other cooking sites, and everybody has been using Cheerios to make cookies and everything you can imagine.
 But here is my recipe, that I just substituted a portion of the flour for blended Cheerios:
- 1 cup of Cheerios (after blended)
- 1 1/4 cup of flour
- 2 sticks of butter (room temperature)
- 3/4 cup of brown sugar
- 1/2 tsp of baking soda
- 1/4 cup of sugar
- 1 tsp of salt
- 2 tsp of vanilla
- 2 eggs
- 1 1/2 cups of semisweet chocolate chips
Beat butter until creamy, then add white and brown sugar. Next mix eggs,vanilla, salt, and baking soda. Mix the flour and Cheerios by hand, and after well incorporated, add the chocolate chips.
But here is my recipe, that I just substituted a portion of the flour for blended Cheerios:
- 1 cup of Cheerios (after blended)
- 1 1/4 cup of flour
- 2 sticks of butter (room temperature)
- 3/4 cup of brown sugar
- 1/2 tsp of baking soda
- 1/4 cup of sugar
- 1 tsp of salt
- 2 tsp of vanilla
- 2 eggs
- 1 1/2 cups of semisweet chocolate chips
Beat butter until creamy, then add white and brown sugar. Next mix eggs,vanilla, salt, and baking soda. Mix the flour and Cheerios by hand, and after well incorporated, add the chocolate chips.
 Bake in 350 F for 8 to 10 minutes.
 You can bake small portions at a time, leaving the dough wrapped and left in the refrigerator.
It is probably not considered healthy, but maybe economical, since I got to make those Cheerios more attractive to eat.
You can bake small portions at a time, leaving the dough wrapped and left in the refrigerator.
It is probably not considered healthy, but maybe economical, since I got to make those Cheerios more attractive to eat.

Wednesday, August 26, 2015
Friday, August 14, 2015
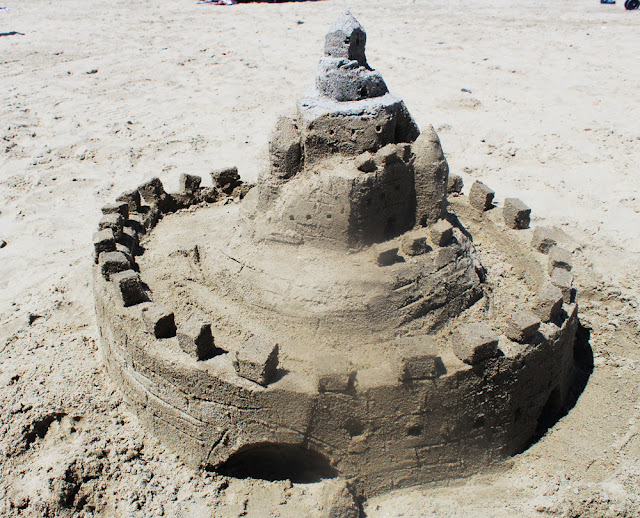
Sand Castle Day.
I grew up going to the beach in Brazil. We also went in the month of July, which is actually Winter time, when the temperature is nice.
So now that I live in the northern hemisphere, I go all crazy to enjoy the Summer, before it gets cold.
Between all the things I wanted to do before Summer is over, one of them was to build a sand castle. Something I have been planning for years, but never had a chance to make.
I watched all sorts of videos to learn with the professionals.
Then we packed all of our beach equipment, and drove off with our friends in a beautiful day.
I started early in the morning, and following sand castle professionals advice, I made a mountain of sand and water.  I used a technique from the videos, using a bucket with a hole in the end. Pack sand and water, then just unmold nicely (like they say).
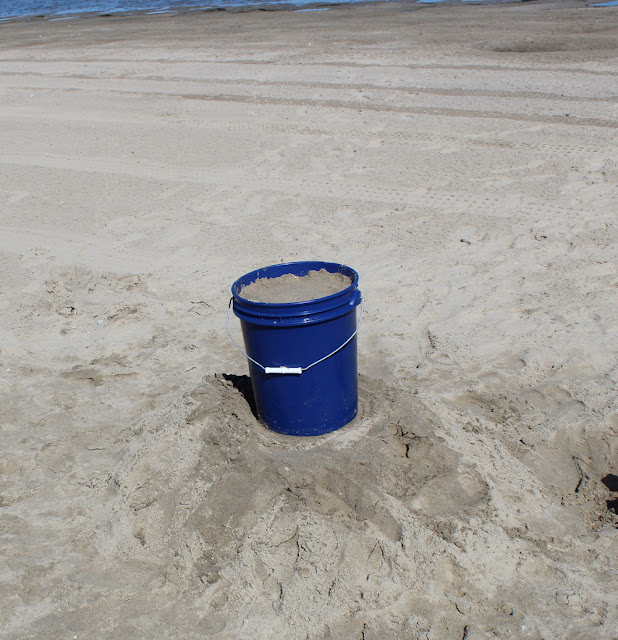 Of course for me it didn't work, and all the sand fell to the sides.
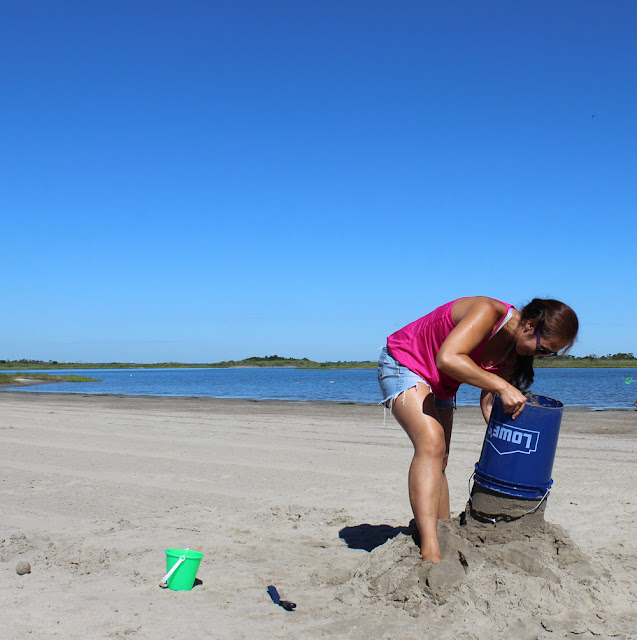 And I had to make everything again by hand.
 It was a lot of shaping, packing more sand and water.
 And between collapsing parts, adjusting the walls, and changing plans, it started to look like a castle.
But the best part was when the little kids started to come around, and get excited about my pile of sand.
And between collapsing parts, adjusting the walls, and changing plans, it started to look like a castle.
But the best part was when the little kids started to come around, and get excited about my pile of sand.
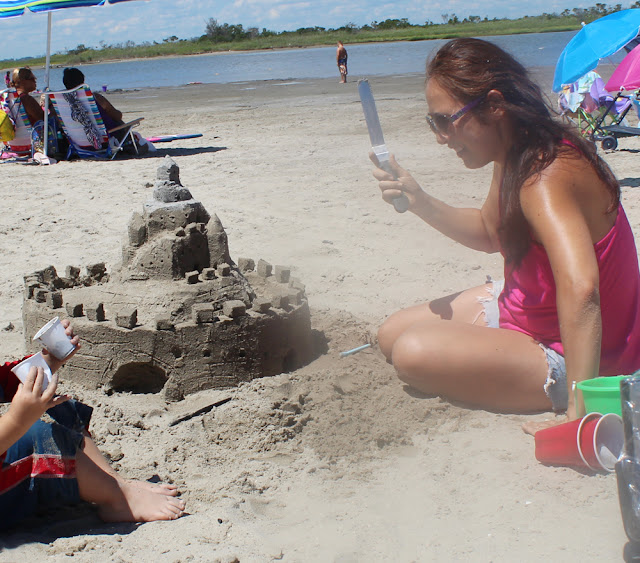
 In the end I made two little friends. They liked so much, and one of the cute little boys helped me make windows.
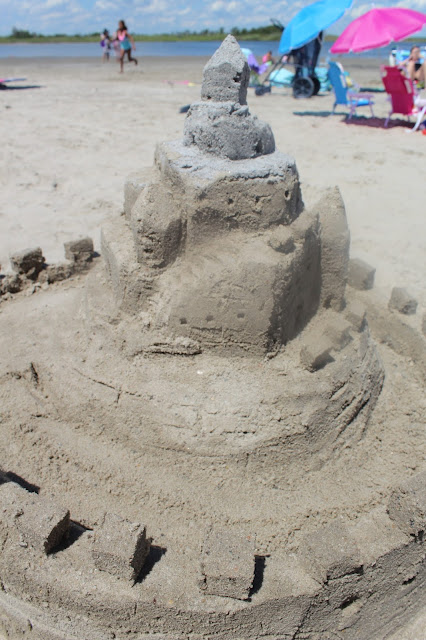
 It was about four hours of work, and it didn't quite looked the way I wanted. But when the little kids were all happy and excited, it really made my day.
 Thank you nice litte boys and their mom who I don't know the name.
 You made it all worth it.
 I used a technique from the videos, using a bucket with a hole in the end. Pack sand and water, then just unmold nicely (like they say).
 Of course for me it didn't work, and all the sand fell to the sides.
 And I had to make everything again by hand.
 It was a lot of shaping, packing more sand and water.
 And between collapsing parts, adjusting the walls, and changing plans, it started to look like a castle.
But the best part was when the little kids started to come around, and get excited about my pile of sand.
And between collapsing parts, adjusting the walls, and changing plans, it started to look like a castle.
But the best part was when the little kids started to come around, and get excited about my pile of sand.

 In the end I made two little friends. They liked so much, and one of the cute little boys helped me make windows.
 It was about four hours of work, and it didn't quite looked the way I wanted. But when the little kids were all happy and excited, it really made my day.
 Thank you nice litte boys and their mom who I don't know the name.
 You made it all worth it.
Tuesday, August 11, 2015
Friday, August 7, 2015
Hamburger Bean Bag.
I was so out of ideas, and had no new projects in mind, I thought my creativity had vanished. Just when my son mentioned the other day, he planned to have a bean bag in a shape of a hamburger.
That is when I jumped in, and had my next project in line: attempt a DIY hamburger bean bag.
 So I took a ride to Jo-Ann Fabrics and bought the fabric (all of the fabrics were 54 inches wide):
- 4 yards of Honey plush felt (for the bread)
- 2 yards of chocolate plush felt (for the burger)
- 1 yard of yellow fleece (for cheese)
- 1 yard of of green fleece (for lettuce)
- 1 yard of red fleece (for tomatoes)
- 2 yards of any fabric to make the bottom parts (I used an old piece of tough fabric, and a old pillowcase).
For filling material I went to AC Moore:
- 2 boxes of 5 Lbs polyester fiber fill (for stuffing the bread)
- 1 roll of quilt batting for stuffing the flat projects.
* The material didn't come out exactly cheap like I thought, especially because the discount coupon I had wasn't valid until the next day.
Back home I had to find a way to make a pattern. So I started from the bottom, and made the bread:
I cut a 34 inch diameter piece of a tough fabric (I used denim) I had at home. Color doesn't matter because it will be on the floor.
And I cut what would be the sides of the bread, a strip 104 inches long by 12 inches high.
So I took a ride to Jo-Ann Fabrics and bought the fabric (all of the fabrics were 54 inches wide):
- 4 yards of Honey plush felt (for the bread)
- 2 yards of chocolate plush felt (for the burger)
- 1 yard of yellow fleece (for cheese)
- 1 yard of of green fleece (for lettuce)
- 1 yard of red fleece (for tomatoes)
- 2 yards of any fabric to make the bottom parts (I used an old piece of tough fabric, and a old pillowcase).
For filling material I went to AC Moore:
- 2 boxes of 5 Lbs polyester fiber fill (for stuffing the bread)
- 1 roll of quilt batting for stuffing the flat projects.
* The material didn't come out exactly cheap like I thought, especially because the discount coupon I had wasn't valid until the next day.
Back home I had to find a way to make a pattern. So I started from the bottom, and made the bread:
I cut a 34 inch diameter piece of a tough fabric (I used denim) I had at home. Color doesn't matter because it will be on the floor.
And I cut what would be the sides of the bread, a strip 104 inches long by 12 inches high.
 To complete this piece of bread I cut another 34 inch diameter, this time in the bread color fabric.
 Using the burger color, I cut two 34 inches diameter circles. and a strip 2 inches high and 104 inches long.
 For the lettuce I just used the green fabric, folded, and cut waves around.
For two tomatoes, four circles of 16 inches diameters, and four long strips 49 inches long by 1 inch high to make the sides.
For the lettuce I just used the green fabric, folded, and cut waves around.
For two tomatoes, four circles of 16 inches diameters, and four long strips 49 inches long by 1 inch high to make the sides.
 Finally the top bread piece, I used a pillowcase, cut it open, and cut a 34 inch diameter circle, for the part underneath.
 And for the part on top, a 46 inches diameter circle, with the honey color fabric for the bread.
 Next morning I was ready for work.
I started from the bottom, sewing the circle that goes on the floor, with the sides of the bread. Here is a view upside down, after sewing.
Next morning I was ready for work.
I started from the bottom, sewing the circle that goes on the floor, with the sides of the bread. Here is a view upside down, after sewing.
 Next I sewed the 34 inches circle in the bread color to the top, leaving an opening for stuffing.
 This is after stuffed.
 For the cheeses I cut the yellow fabric in half, to make two half yard pieces of cheese. I also cut the quilting stuffing (called Quilt Batting) in the same shape.
 And sewed two rectangles.
 Next for the lettuce, I first cut the filling in the shape, sewed, then stuffed.

 For the tomatoes I first sewed the strips on the side, to give a little height.
 A little trick I learned from my Mom, is that for round sewing projects, we need to make small cuts after sewing, to give a better finish after turning right side out.
 Then cutting the filling to a round shape, stuff and close.
 The burger piece was like the tomato but big: sewing the sides with the strip, sewing the top, stuff and close.

 The last part was the top bread. So I hand sewed the 46 inches circle (with the honey colored fleece) and pulled the seam, to make the circumference smaller to match the 34 inch circle ( made with the green pillowcase fabric).
 Then both sewed together, leaving a hole to turn inside out.
 By this time I needed help to put the stuffing in.
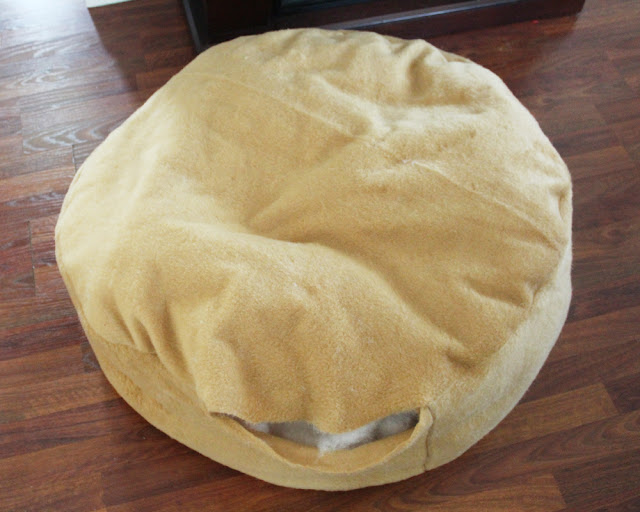
 After closing it already looked like a hamburger.
 Finally to make more realistic, I made the sesame seeds using scraps of white fleece (cut into a teardrop shape), and hand sewn to the bread.
 I was so relieved that my final work was how I imagined. After all the money and time I spent, it would be a shame to be all ruined. Thank Heavens it worked.
And everyone enjoyed.
I was so relieved that my final work was how I imagined. After all the money and time I spent, it would be a shame to be all ruined. Thank Heavens it worked.
And everyone enjoyed.


 So I took a ride to Jo-Ann Fabrics and bought the fabric (all of the fabrics were 54 inches wide):
- 4 yards of Honey plush felt (for the bread)
- 2 yards of chocolate plush felt (for the burger)
- 1 yard of yellow fleece (for cheese)
- 1 yard of of green fleece (for lettuce)
- 1 yard of red fleece (for tomatoes)
- 2 yards of any fabric to make the bottom parts (I used an old piece of tough fabric, and a old pillowcase).
For filling material I went to AC Moore:
- 2 boxes of 5 Lbs polyester fiber fill (for stuffing the bread)
- 1 roll of quilt batting for stuffing the flat projects.
* The material didn't come out exactly cheap like I thought, especially because the discount coupon I had wasn't valid until the next day.
Back home I had to find a way to make a pattern. So I started from the bottom, and made the bread:
I cut a 34 inch diameter piece of a tough fabric (I used denim) I had at home. Color doesn't matter because it will be on the floor.
And I cut what would be the sides of the bread, a strip 104 inches long by 12 inches high.
So I took a ride to Jo-Ann Fabrics and bought the fabric (all of the fabrics were 54 inches wide):
- 4 yards of Honey plush felt (for the bread)
- 2 yards of chocolate plush felt (for the burger)
- 1 yard of yellow fleece (for cheese)
- 1 yard of of green fleece (for lettuce)
- 1 yard of red fleece (for tomatoes)
- 2 yards of any fabric to make the bottom parts (I used an old piece of tough fabric, and a old pillowcase).
For filling material I went to AC Moore:
- 2 boxes of 5 Lbs polyester fiber fill (for stuffing the bread)
- 1 roll of quilt batting for stuffing the flat projects.
* The material didn't come out exactly cheap like I thought, especially because the discount coupon I had wasn't valid until the next day.
Back home I had to find a way to make a pattern. So I started from the bottom, and made the bread:
I cut a 34 inch diameter piece of a tough fabric (I used denim) I had at home. Color doesn't matter because it will be on the floor.
And I cut what would be the sides of the bread, a strip 104 inches long by 12 inches high.
 To complete this piece of bread I cut another 34 inch diameter, this time in the bread color fabric.
 Using the burger color, I cut two 34 inches diameter circles. and a strip 2 inches high and 104 inches long.
 For the lettuce I just used the green fabric, folded, and cut waves around.
For two tomatoes, four circles of 16 inches diameters, and four long strips 49 inches long by 1 inch high to make the sides.
For the lettuce I just used the green fabric, folded, and cut waves around.
For two tomatoes, four circles of 16 inches diameters, and four long strips 49 inches long by 1 inch high to make the sides.
 Finally the top bread piece, I used a pillowcase, cut it open, and cut a 34 inch diameter circle, for the part underneath.
 And for the part on top, a 46 inches diameter circle, with the honey color fabric for the bread.
 Next morning I was ready for work.
I started from the bottom, sewing the circle that goes on the floor, with the sides of the bread. Here is a view upside down, after sewing.
Next morning I was ready for work.
I started from the bottom, sewing the circle that goes on the floor, with the sides of the bread. Here is a view upside down, after sewing.
 Next I sewed the 34 inches circle in the bread color to the top, leaving an opening for stuffing.
 This is after stuffed.
 For the cheeses I cut the yellow fabric in half, to make two half yard pieces of cheese. I also cut the quilting stuffing (called Quilt Batting) in the same shape.
 And sewed two rectangles.
 Next for the lettuce, I first cut the filling in the shape, sewed, then stuffed.

 For the tomatoes I first sewed the strips on the side, to give a little height.
 A little trick I learned from my Mom, is that for round sewing projects, we need to make small cuts after sewing, to give a better finish after turning right side out.
 Then cutting the filling to a round shape, stuff and close.
 The burger piece was like the tomato but big: sewing the sides with the strip, sewing the top, stuff and close.

 The last part was the top bread. So I hand sewed the 46 inches circle (with the honey colored fleece) and pulled the seam, to make the circumference smaller to match the 34 inch circle ( made with the green pillowcase fabric).
 Then both sewed together, leaving a hole to turn inside out.
 By this time I needed help to put the stuffing in.
 After closing it already looked like a hamburger.
 Finally to make more realistic, I made the sesame seeds using scraps of white fleece (cut into a teardrop shape), and hand sewn to the bread.
 I was so relieved that my final work was how I imagined. After all the money and time I spent, it would be a shame to be all ruined. Thank Heavens it worked.
And everyone enjoyed.
I was so relieved that my final work was how I imagined. After all the money and time I spent, it would be a shame to be all ruined. Thank Heavens it worked.
And everyone enjoyed.


Subscribe to:
Posts (Atom)