Since my attempt to make gingerbread man was successful, I decided to be braver and go for a gingerbread house. After debating on the type of house, I chose a Christmas barn (I guess animals always be a part of my work).
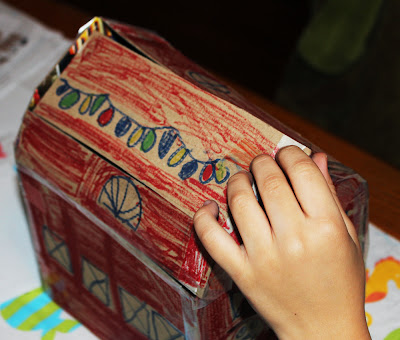
First I grabbed some cardboard to work on a prototype.

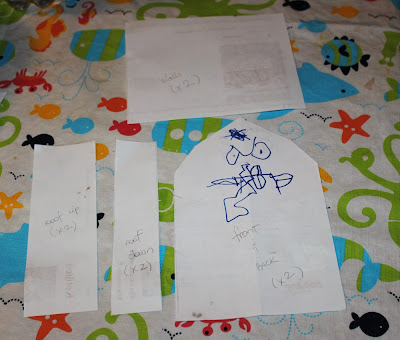
Then I made the template in paper, to be cut in the dough (my kid got ahead of me and used one of my papers to draw).
And the cardboard model could be used for the kids to color and play, and even gave me ideas.
Then I used the recipe from Food Network :
Gingerbread 101.

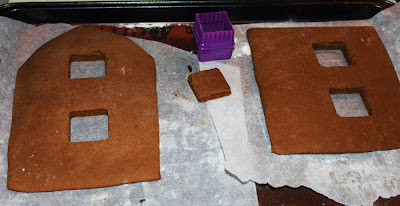
Making according to the instructions, and cutting each piece following my templates, they baked well and weren't too hard.
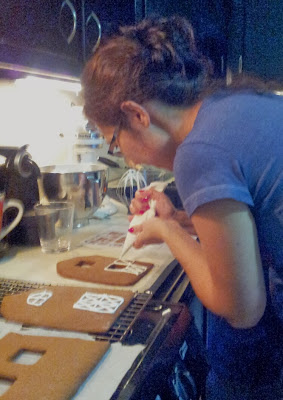
While the pieces of gingerbread were cooling, I made the icing and colored some of them, using
gel food coloring.

I made some horses cutting the dough with a knife, and using my fingers to shape it better.
Still flat on the table, I decorated all the pieces using pipping bags using cones of parchment paper (learn how to make
here on this link).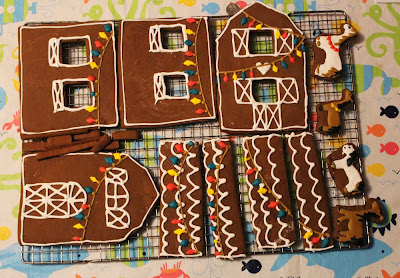
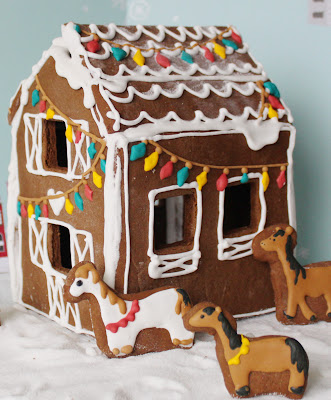
After a couple of hours the sugar of the decoration was dry, so I could assemble my barn, propping the sides using my cans of beans, so they would stay still. There were a lot of parts that would touch perfectly, so I blobbed a bunch of icing to cover, and to keep it attached. So I left to dry overnight.

The next day it was all dry and ready for pictures...


... and playing, before we leave for Santa to eat.
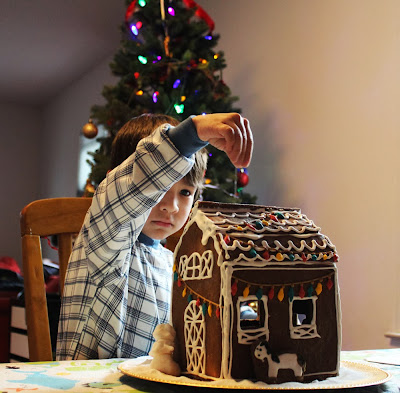
Merry Christmas!
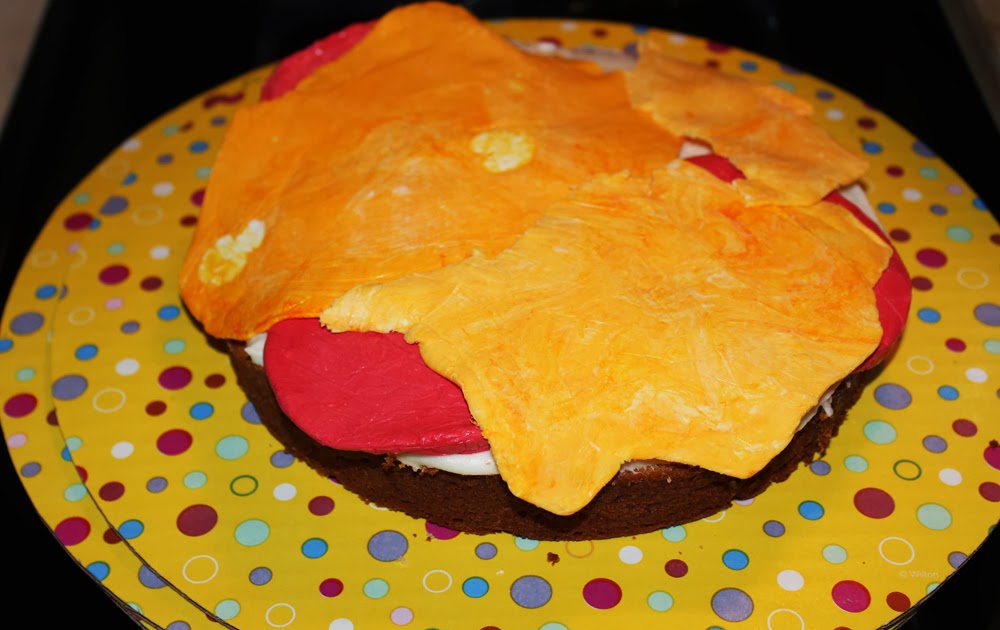
 While the cake was baking, I made a recipe of Candy Clay, then used food coloring to make the lettuce, tomatoes and cheese. To make the shapes, I used a rolling pin to roll the different color candy clays, wrapped in plastic film. After flat, they were cut in four pieces with a pizza cutter. Finally I shaped the edges of each piece using my fingers (tomato, lettuce and cheese). If they are too soft, place back in the refrigerator.

 To make the "mayo", I used vanilla frosting, recipe from Food Network: Vanilla Frosting.
After the cake is cool, I cut in half.
Then the cake is stacked: bottom part of cake, vanilla frosting, tomato, cheese and lettuce.
To make the "mayo", I used vanilla frosting, recipe from Food Network: Vanilla Frosting.
After the cake is cool, I cut in half.
Then the cake is stacked: bottom part of cake, vanilla frosting, tomato, cheese and lettuce.


 The top half was covered with fondant, mixed with brown food coloring. The sesame seeds were made also with fondant, and a little more brown food coloring.
And here the burger cake ready.
The top half was covered with fondant, mixed with brown food coloring. The sesame seeds were made also with fondant, and a little more brown food coloring.
And here the burger cake ready.


