Made by hands, expressed from the heart.

Tuesday, December 30, 2014

Happy 2015!

This New Years I decided to make something simple to have fun for New Year's Eve , and the "Photo Booth" idea seemed to be ideal. Just paper, some straws and the camera.
I cut out different colors of card stock paper in different shapes: mustaches, bow ties, lips, and New Year's signs. Then I attached each one to a straw with scotch tape.
I had some glue glitter and decorated a little. I also had some holiday card stock, to make more colorful.
And some holiday decoration stolen from the tree for the background makes a great picture.

And the whole family can celebrate...

...even those who don't like to dress up. Happy 2015! I made a printable sheet so everyone could use this idea and print, but unfortunately Google thinks that is a problem with my file, so is not letting me load to print.
But I have faith you guys can use your crafty side, and make your own mustaches and signs.
Enjoy this idea and have fun!

Wednesday, December 24, 2014

Holiday Statement Sweater, not Ugly.

At first I had no idea when people mentioned "Ugly Sweaters".
We do celebrate Christmas in Brazil, but I just understood about this concept in the recent years. And to tell you the truth, I think they are cute.
So I decided last minute to make one, with whatever I had in my house.
I wanted to make a Christmas tree, but there was no green felt in my cabinet. I had a big piece of blue, and that is why I ended up making a penguin. I also found some small pieces of assorted colors, different sizes pompoms, and a couple of black beads (for the eyes).
So first I cut up all the pieces.
With the help of my hot glue gun, I started place the pieces together.

I used an old sweater I had, and sewed in a couple of places, enough to attach the piece, but not too many to damage the sweater (I still plan to remove everything so I can wear my plain sweater).
Then I stole some of the decorations from my tree, and tied in a few places.

They made it look more colorful.
Then all done and ready to party.
Now I also have a cute sweater too.

Monday, December 22, 2014

Veggie Christmas Tree.

I was so excited to see that I could participate on the Christmas party at school for my fourth grader. Then when I saw that the yummy popular snacks were already claimed by another parents. My choices were: napkins or vegetables.
So with a deep breath, I decided to be brave and take on the veggies, knowing that I won't be very popular on the snack table.
But... I hope one of the kids will maybe eat, a little piece of broccoli, or tomato, or carrot, or pepper. Instead of cookies and cupcakes,
No, not really.
I tried my best though.

Thursday, December 18, 2014

Gifting Time.

It is always hard to make gifts for the teachers, and give them something they really like.
This year my first grader got lucky (or I did), because one of his teachers have a little chihuahua.
So lucky me was able to grab my clay, and make a chihuahua, as close as I could to the picture I saw at her door.

Since I could not get a clue from my children, about the other teachers preferences, I made little birds to stuff these mugs with other small gifts.
Gift giving is always difficult, but showing that you care is not so hard.

Tuesday, December 16, 2014

Christmas Party.

I have been coloring my drawings in the computer, and make them available to print.
So for this Christmas party I made some decorations, and you can use them too.
After printing and cutting I glued some of the illustrations in colorful cardstock paper.
And used them to decorate little snack cups and juice boxes.
Also placed them on top of cupcakes.
The free printables for these decorations are on THIS LINK.
I hope you like, make them and send pictures.
Happy Holidays!

Saturday, December 13, 2014

Christmas Tree, a healthy dessert.

This is not my original idea, and I thought it was so clever I had to try to make this beautiful Christmas centerpiece.

The base is made of a carrot on top of an apple, attached by a skewer (this part is a little dangerous, be careful if you try).
The bottom is covered with leaves of kale, using toothpicks.

Then you go all the way up using toothpicks around, and alternating fruit with different colors.
It didn't look like a tree in the beginning, but as I was filling the spaces with fruit, it looked better.
The star on top is made of a piece of cantaloupe, I cut with a knife.
It was bending a little to the side, so all I did was propping with a big skewer on the back, with an apple on the bottom to hold.
Then I put the better looking "face" to the front, and my guests were so impressed they didn't even notice the flaw (until I showed them).
The kids loved it and had a healthy dessert.

Thursday, December 11, 2014

Girl Ninjabread Cookies.

Last year I bought this gingerbread cookie kit called Ninjabread Cookie Kit, and I made some Gingerbread Cookies shaped like ninjas. My boys loved them.
But this weekend I am having toddler girls guests, and I think they would appreciate more colorful cookies.
So I used the same cookies cutters, and turned them into girls.
I first made a batch of gingerbread cookies, using a recipe from Taste of Home (click here to go to the recipe page).
While the dough was refrigerating, I made the royal icing, using the recipe from Food.com (click here too, to get the recipe) .
Then to decorate, I line them up to work quickly, before the kids would get home from school.
Then using one color at at time,I decorated the cookies. I also planned ahead how they were going to look like, drawing in paper.
So with the same shapes, I can make boy and girl cookies.
But the boys loved the girl cookies, and the little girls might prefer the ninjas.
We will see.

Saturday, December 6, 2014

Gingerbread House for Little Mouse. And Printable!

I grew up making little doll houses using newspapers and sticky rice instead of glue.
Now that I have so many different options available, I decided to get out of my comfort zone and make everything in the computer. Plus make it printable, so not only my kids can play with it, but anyone who have a printer around.
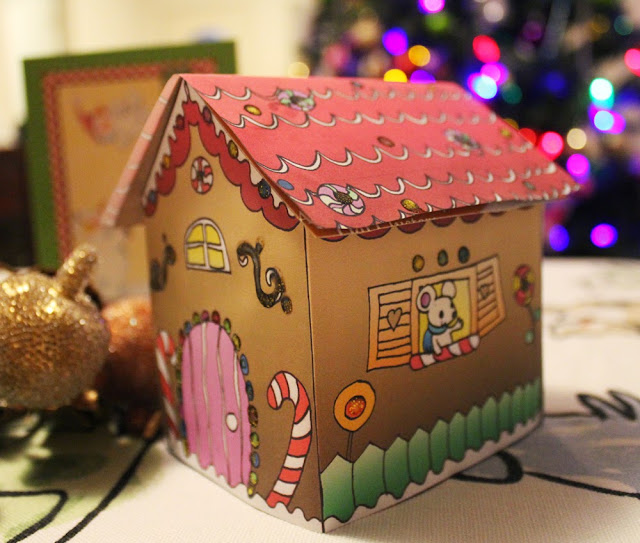
After a few ideas, I drew in paper a little Gingerbread House, with a Mouse. Then scanned on my computer (and that already was a challenge).
After coloring in the computer, I made it available to print.
Note: I used the dimensions of two boxes of Jell-o Pudding, to make the house sturdier, but you don't have to use it.
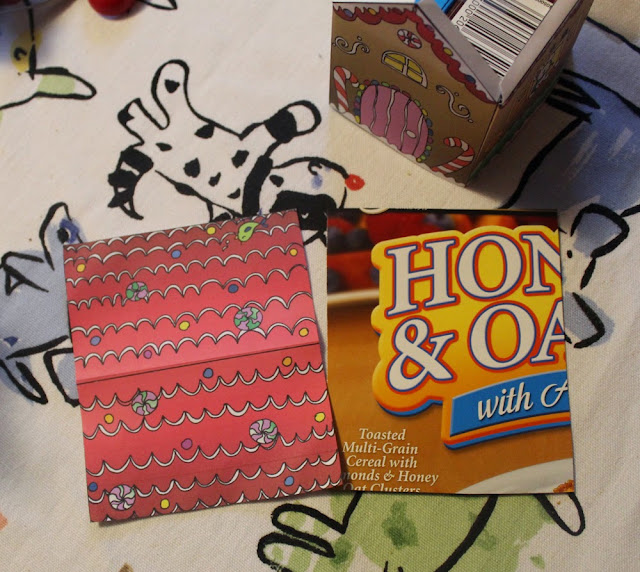
After cutting the pieces, the longest part goes around the boxes of Je-llo, like this:
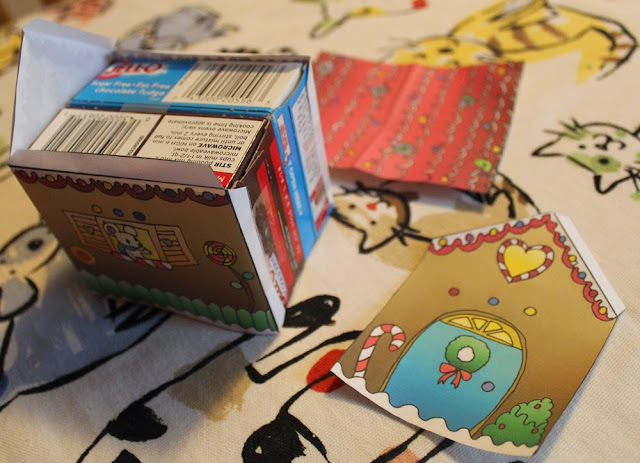
The other piece with the door was attached with double tape (you can use glue too).
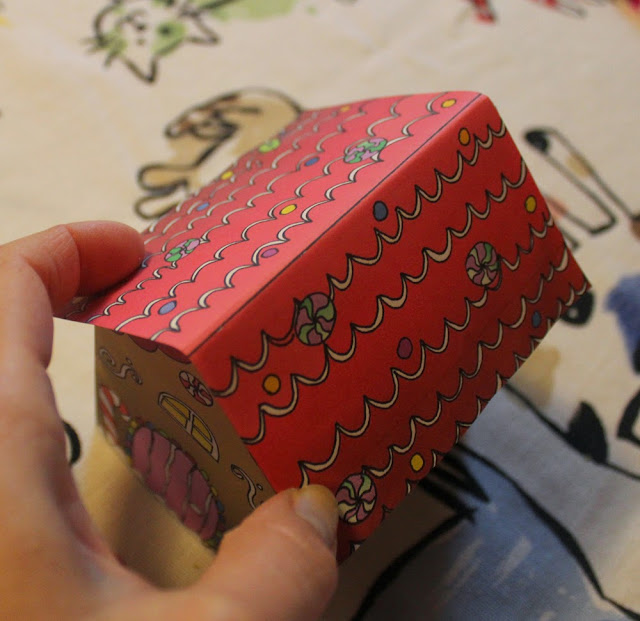
The last part was the roof. I glued it to a piece of cardboard (from a cereal box) to make it harder, but that is also optional.

The last step was to place glue on the top tabs.

And gently placing the roof.
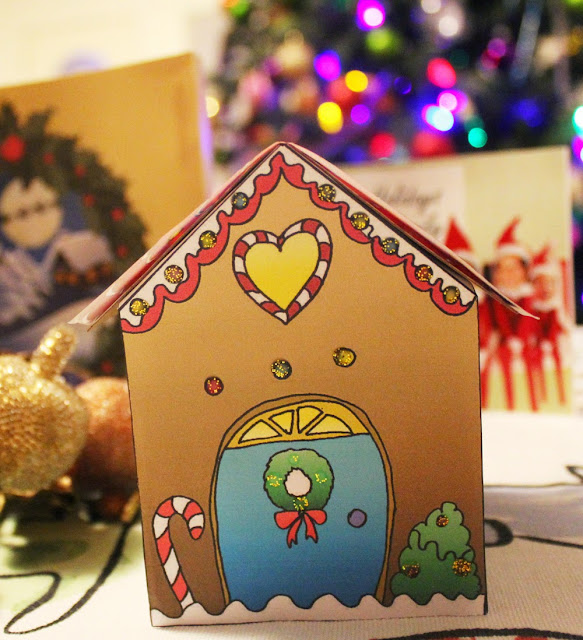
It looks cute for decoration just like it is...
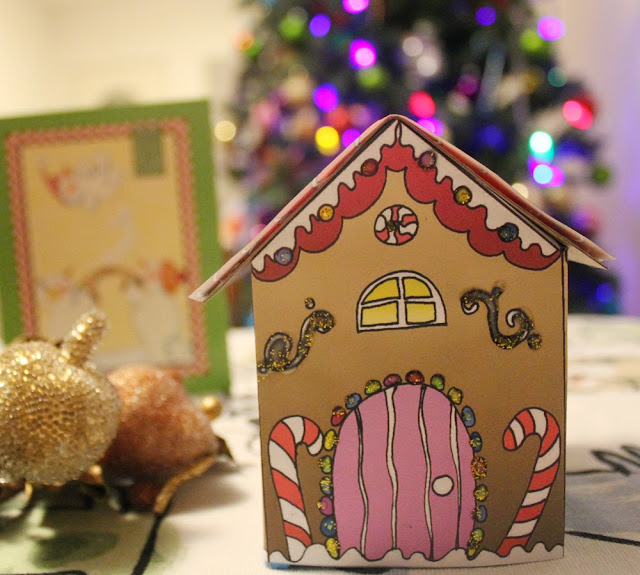
...or you can add a little more. I used some glitter glue I had from the craft store.
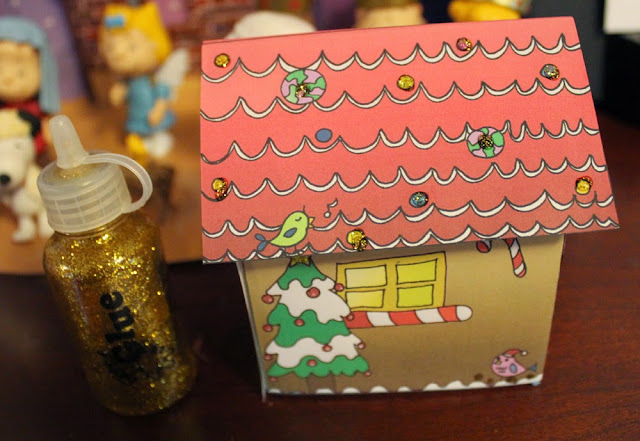
It is an extra touch for the decoration, and the kids can play.
I you want to print the house, just click HERE.
I hope you can make, decorate and play.
Let me know if you like, and send some suggestions, so I can make more.
Enjoy!