Summer is coming, but new outfits really make a whole in the pocket, especially if you use nice materials. I am no seamstress, but I decided to overcome my fear of silk and come face to face to it. But first I did a little research, and found some tips on how to deal with silk on
Tips and Tricks.
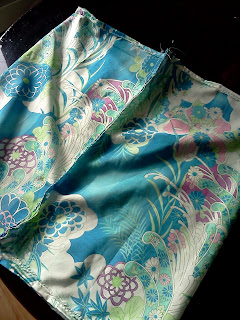
Finding the fabric was harder than I thought, everything I saw did not resemble the beautiful dresses I saw on sale for U$200.00 (and up and up). Finally I saw these beautiful pieces at
Etsy.com. I got three pieces of fabric in order to make one dress, and everything plus shipping came out to U$37.00. The only thing I didn't expect was that it took about a month to get them. I didn't know they were shipped from overseas, but it came nicely wrapped in paper, with a bow, and with a couple of cute buttons and a heart as a gift.

Still very anxious, I placed the fabrics on top of my body to decide what to make, and what style would look better for my body. I even had to look at some websites to find my body type and what would look better. The one it was very helpful was
Ways to Dress Your Body Type.
So instead of making a dress, I decided to make a skirt and 2 tops, so then I would have more outfits to mix and match.
The first top was an "off the shoulder", and I took my 1/2 yard of fabric and connected the ends, to form a tube shape.
After sewing the ends, I tried it on, and marked where the strap was going to attach. But then I didn't have anything to make a strap for it, so going through my stuff, I found a little bracelet I bought last year on sale for $4.00. I placed on top of the fabric, and thought they looked nice together. So I hand sewed the bracelet, and in the front I "bunched up" some fabric to go through on the last ring. This make the top not to look so flat in the front, and gives a little more shape to my upper body, that is not so curvacious. Reminding that the pattern of this top is flat on the sides, so it doesn't shape up the waistline. But I found that silk is very forgiving to wear, so it falls graciously in the body. And because I am very impatient and have difficulty finding a pattern to buy.

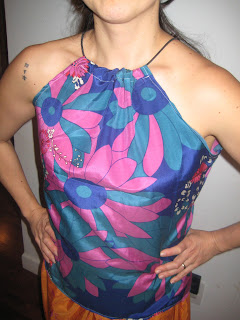
The second top I decided to make a halter top. I cut my 1 yard fabric on the shape of my T-shirt that is tighter on the sides (I cut a little bigger because silk doesn't stretch).
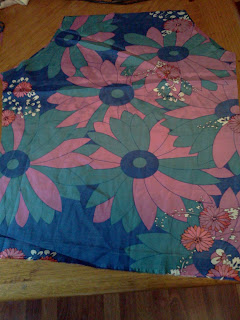
Closed the sides, finished the ends, and sewed the neck of the halter to place a string to it, that will make the drawstring (for a clearer explanation of these steps, you can look at this:
DIY link). I wanted to use a black, elastic string to hold on the neck. And I found one in a jacket that wasn't in use anymore.

And my second top was ready.
To make the skirt, I just wanted to find the simplest and laziest way to make it. This was the best explanation that I found on this cute blog called
Sweet Tea and Pumps. And that is my skirt with the top.

I spent one weekend to make, wasn't that stressful, and saved lots of money.
 Still very anxious, I placed the fabrics on top of my body to decide what to make, and what style would look better for my body. I even had to look at some websites to find my body type and what would look better. The one it was very helpful was Ways to Dress Your Body Type.
So instead of making a dress, I decided to make a skirt and 2 tops, so then I would have more outfits to mix and match.
The first top was an "off the shoulder", and I took my 1/2 yard of fabric and connected the ends, to form a tube shape.
Still very anxious, I placed the fabrics on top of my body to decide what to make, and what style would look better for my body. I even had to look at some websites to find my body type and what would look better. The one it was very helpful was Ways to Dress Your Body Type.
So instead of making a dress, I decided to make a skirt and 2 tops, so then I would have more outfits to mix and match.
The first top was an "off the shoulder", and I took my 1/2 yard of fabric and connected the ends, to form a tube shape. After sewing the ends, I tried it on, and marked where the strap was going to attach. But then I didn't have anything to make a strap for it, so going through my stuff, I found a little bracelet I bought last year on sale for $4.00. I placed on top of the fabric, and thought they looked nice together. So I hand sewed the bracelet, and in the front I "bunched up" some fabric to go through on the last ring. This make the top not to look so flat in the front, and gives a little more shape to my upper body, that is not so curvacious. Reminding that the pattern of this top is flat on the sides, so it doesn't shape up the waistline. But I found that silk is very forgiving to wear, so it falls graciously in the body. And because I am very impatient and have difficulty finding a pattern to buy.
 The second top I decided to make a halter top. I cut my 1 yard fabric on the shape of my T-shirt that is tighter on the sides (I cut a little bigger because silk doesn't stretch).
 Closed the sides, finished the ends, and sewed the neck of the halter to place a string to it, that will make the drawstring (for a clearer explanation of these steps, you can look at this: DIY link). I wanted to use a black, elastic string to hold on the neck. And I found one in a jacket that wasn't in use anymore.
  And my second top was ready.
  To make the skirt, I just wanted to find the simplest and laziest way to make it. This was the best explanation that I found on this cute blog called Sweet Tea and Pumps. And that is my skirt with the top.
  I spent one weekend to make, wasn't that stressful, and saved lots of money.


