It has been a little more than a year that I quit my career of 20 years in the Veterinary field, to spend more time with my family, and further utilize my creative side of the brain.
And one of the things we have been wanting to do was to learn
Taiko. We were lucky enough to find a place here in Long island,
Ryu Shu Kan. And the whole family (of 4 people) started taking classes.
And I could never imagine this decision would make me experience a whole new dimension to my existence.
Besides meeting so many great people, and learning music for the first time, I learn more and more about the culture and costumes of my parents and their ancestors.
My father left Japan when he was 6 years old when his parents decided to live in Brazil, my mom was the daughter of Japanese immigrants in Brazil, and never had a chance to go to Japan.
I grew up in Brazil and never been in Japan, so I never quite understood why I was raised so different than the other kids.
Now that I know a little more about the culture, it makes more sense the way me and my siblings grew up. And now that I don't have my parents to answer my questions, I have great interest to learn more about Japan, hoping one day me and my family can go for a visit.
We became so captivated by the art, the music, that me and my husband are learning Japanese, and he decided to make a real Taiko in the backyard, so we can practice at home.

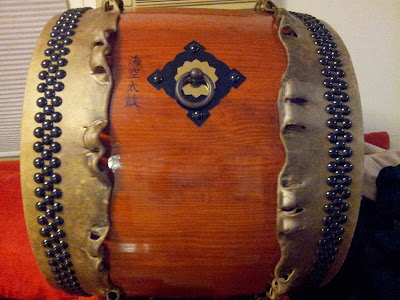
But then we wanted a small version, a tiny Taiko to carry around, but I was Googling all over and could only find it on wholesale, from China. Another alternative was to go buy in Japan. Since we don't know when we will be able to go there, we decided to make ourselves.
It took a long time for us to figure out how to make it looking like the real one, and after a few months and a lot of failed trails, we came up with the technique I will show now.
Starting with the body, they sell tiny barrels at the craft store, but they never the right shape. So my husband, more familiar with power tools, used a cylindrical piece of wood and showed me how to use a drill to get the shape we wanted.


Next the pieces are painted with coating.
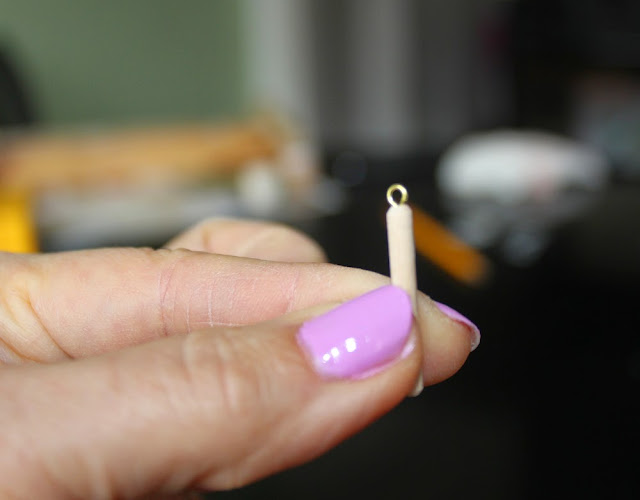
While drying, I made the
bachis, cutting a long piece of wood stick to the appropriate size.

Then drilling a hole in the middle.

And sanding both sides to take the edges out, making smoother and more realistic.


After that, a piece of jewelery metal is attached with hot glue gun.
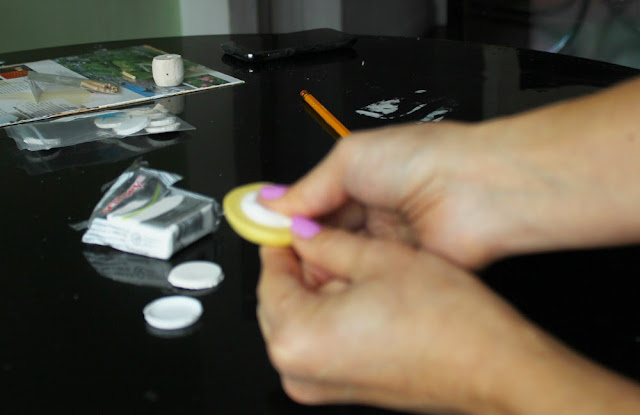
The trickiest part was to make what is originally made from cow's skin. After many ugly attempts, my husband ended up making a 3D model in computer, and had it especially made in a 3D printer. With that piece we made a mold, and use that to make the pieces in polymer clay.
After sanded and cleaned, the two parts are glued to the wood piece.
And final jewelry applied to our little Taiko.

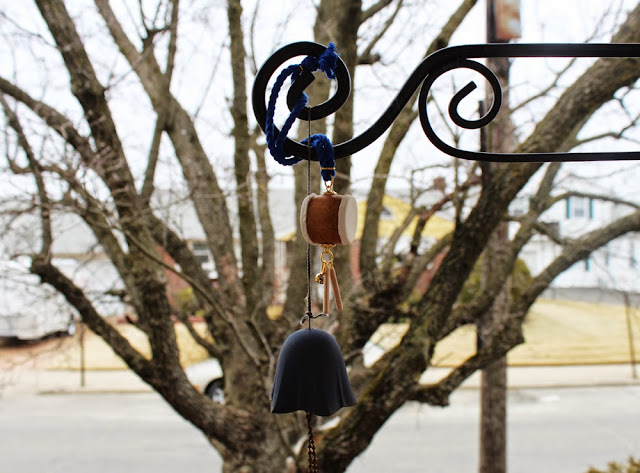
After the rope is attached, it is all ready to go.

These three are packaged to go to a fellow Taiko player in Arizona.

I hope he likes them.

With every piece I make, I feel closer to the culture and the Country my family came from. And one day I will see for myself.
Here is the link to my store to find one:
Etsy I Made for you.

 But then we wanted a small version, a tiny Taiko to carry around, but I was Googling all over and could only find it on wholesale, from China. Another alternative was to go buy in Japan. Since we don't know when we will be able to go there, we decided to make ourselves.
It took a long time for us to figure out how to make it looking like the real one, and after a few months and a lot of failed trails, we came up with the technique I will show now.
Starting with the body, they sell tiny barrels at the craft store, but they never the right shape. So my husband, more familiar with power tools, used a cylindrical piece of wood and showed me how to use a drill to get the shape we wanted.
But then we wanted a small version, a tiny Taiko to carry around, but I was Googling all over and could only find it on wholesale, from China. Another alternative was to go buy in Japan. Since we don't know when we will be able to go there, we decided to make ourselves.
It took a long time for us to figure out how to make it looking like the real one, and after a few months and a lot of failed trails, we came up with the technique I will show now.
Starting with the body, they sell tiny barrels at the craft store, but they never the right shape. So my husband, more familiar with power tools, used a cylindrical piece of wood and showed me how to use a drill to get the shape we wanted.

 Next the pieces are painted with coating.
While drying, I made the bachis, cutting a long piece of wood stick to the appropriate size.
Next the pieces are painted with coating.
While drying, I made the bachis, cutting a long piece of wood stick to the appropriate size.
 Then drilling a hole in the middle.
 And sanding both sides to take the edges out, making smoother and more realistic.

 After that, a piece of jewelery metal is attached with hot glue gun.
 The trickiest part was to make what is originally made from cow's skin. After many ugly attempts, my husband ended up making a 3D model in computer, and had it especially made in a 3D printer. With that piece we made a mold, and use that to make the pieces in polymer clay.
 After sanded and cleaned, the two parts are glued to the wood piece.
And final jewelry applied to our little Taiko.
After sanded and cleaned, the two parts are glued to the wood piece.
And final jewelry applied to our little Taiko.
 After the rope is attached, it is all ready to go.
 These three are packaged to go to a fellow Taiko player in Arizona.
 I hope he likes them.
 With every piece I make, I feel closer to the culture and the Country my family came from. And one day I will see for myself.
 Here is the link to my store to find one:
Etsy I Made for you.
Here is the link to my store to find one:
Etsy I Made for you.