I have been attempting, for the longest time, to have a edible Haunted House.
And instead of procrastinating, this year I started making it, without knowing I was going to finish.
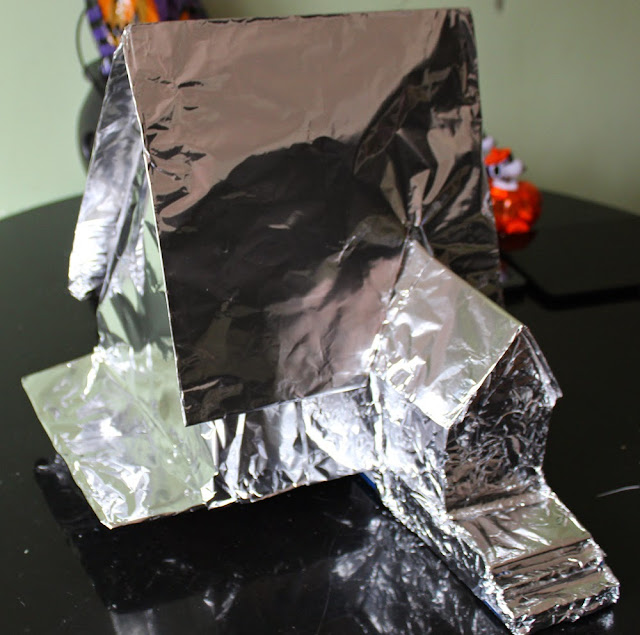
So the beginning of the week, I started on my model. I have made a house in the past, using cake and Rice Kryspies, from the
Gravity Falls Party But there will be enough sugar for the kids, so I decided to make the base out of cardboard.

Then I cover the entire model with aluminum foil, because it will be covered with food.
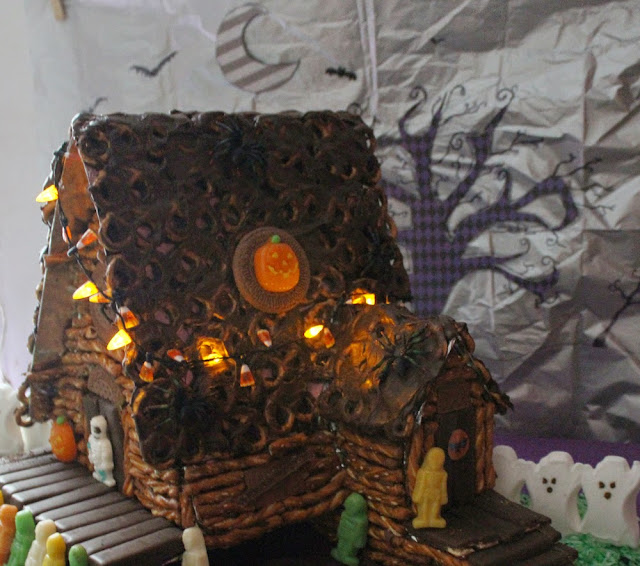
The next step was dip mini pretzels in melted chocolate, and cover the roof (at this point it looked very ugly, but I kept going to see if it would be better in the end).

For the house walls, I used pretzel rods, "glued" with frosting.
And for the entrance floor and doors, I used little chocolate covered wafers. And round cookies to make windows.

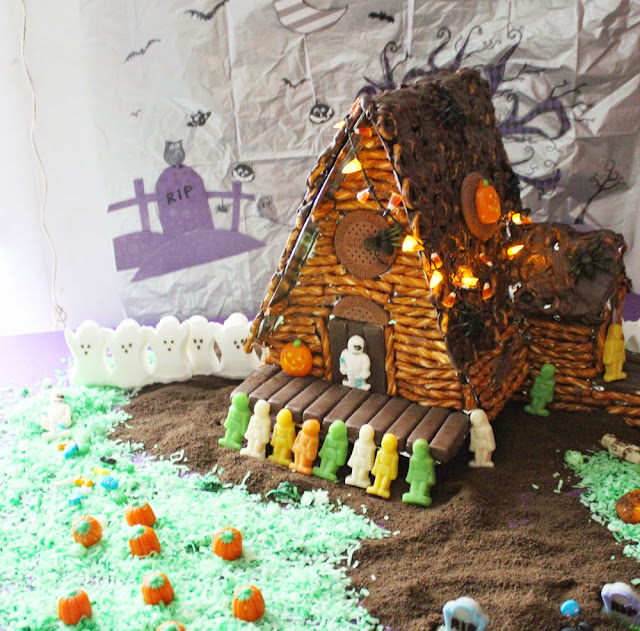
After the house was covered, I decorated with gummy candy Mummies, Pumpkins, and plastic spiders (which WILL be removed before eating).
This was made a day ahead, so I kept refrigerated, just in case.
The day of the party, a couple of hours away, I placed placed the house in the table.
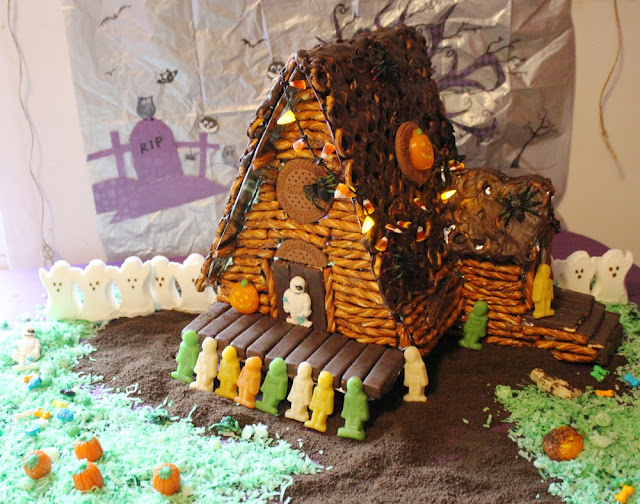
To make it more real, I added some dirt for the ground, which was made from chocolate cookies grinded in the food processor. Plus the grass, made from coconut flakes with green food coloring.

I found some cool gummy candy.
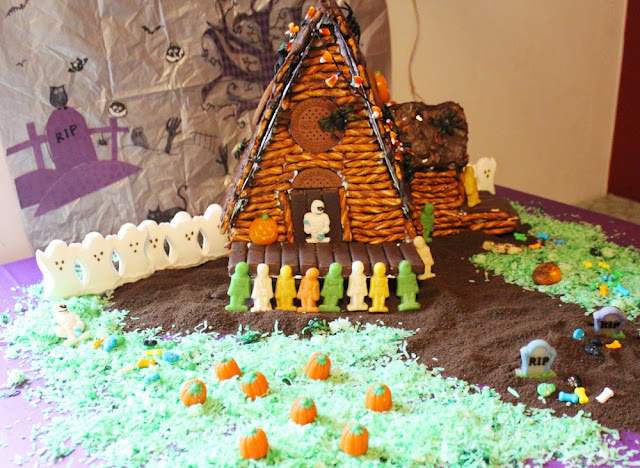
And there was even a light up candy corn necklace( non edible, please).
I made a non- edible decoration, just because I wanted to use these cute clothespins I found at Michaels.

I made this candy corn on the cob, an idea from Instructables.

Now that the table is ready, I can't wait for the kids to come back from school.
 Then I cover the entire model with aluminum foil, because it will be covered with food.
 The next step was dip mini pretzels in melted chocolate, and cover the roof (at this point it looked very ugly, but I kept going to see if it would be better in the end).
 For the house walls, I used pretzel rods, "glued" with frosting.
And for the entrance floor and doors, I used little chocolate covered wafers. And round cookies to make windows.
For the house walls, I used pretzel rods, "glued" with frosting.
And for the entrance floor and doors, I used little chocolate covered wafers. And round cookies to make windows.
 After the house was covered, I decorated with gummy candy Mummies, Pumpkins, and plastic spiders (which WILL be removed before eating).
This was made a day ahead, so I kept refrigerated, just in case.
The day of the party, a couple of hours away, I placed placed the house in the table.
After the house was covered, I decorated with gummy candy Mummies, Pumpkins, and plastic spiders (which WILL be removed before eating).
This was made a day ahead, so I kept refrigerated, just in case.
The day of the party, a couple of hours away, I placed placed the house in the table.
 To make it more real, I added some dirt for the ground, which was made from chocolate cookies grinded in the food processor. Plus the grass, made from coconut flakes with green food coloring.
 I found some cool gummy candy.
 And there was even a light up candy corn necklace( non edible, please).
 I made a non- edible decoration, just because I wanted to use these cute clothespins I found at Michaels.
 I made this candy corn on the cob, an idea from Instructables.
 Now that the table is ready, I can't wait for the kids to come back from school.