My son is turning 9, and I was all excited to plan a party with balloons, animals, and colorful decorations.
Little I knew he does not want balloons or anything cute. But I wanted to stick to a theme, and he agreed that Star Wars is an acceptable one.
So here I go, research everything about Star Wars, and there's tons of parties and ideas from people all over. That made me more excited.
The party is 30 days away, so first I decided to prepare the invitations. We will invite 6 friends, and I hope I can handle them all. I first drew a picture of R2D2 and painted with acrylic paint and a paintbrush. For his name I used gold paint.

In a separate sheet, I wrote the date, address, and RSVP info, trying to make like in the movie. The letters I used a ultra fine black sharpie, and the background I painted with black make up.

I cut them and glued to the invitations.

For decoration, I made a little Star Trooper in polymer clay, and made the details with a black ultra fine Sharpie.

I wanted to have a table with more pictures of the characters from the movie. Since I have been painting and drawing, I decided now it is time for my hands to get a break and print some images.
I will highlight all the links for the printables.
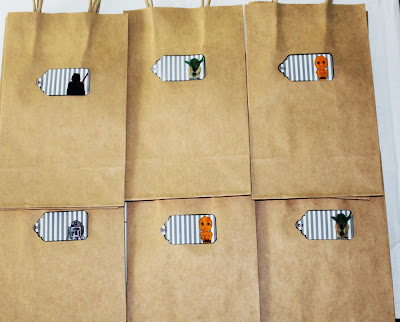
I found these great tags at
familyshoppingbag.com.
One idea was to use to put in the favor bags. These very inexpensive brown bags were from
Michaels.
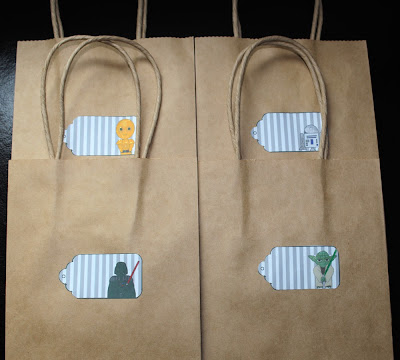
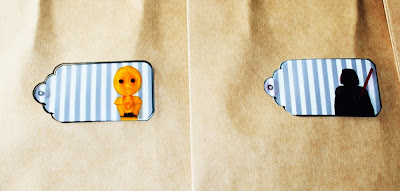
But I got a little disappointed with the lack of color on those prints, probably because I used regular paper. So then I found in my cabinet this
transparency film, to be used in projectors. So I gave it a try, and the prints came out very sharp. I cut them out and with glue on the sides, I placed them on top of the paper prints. They looked much better.
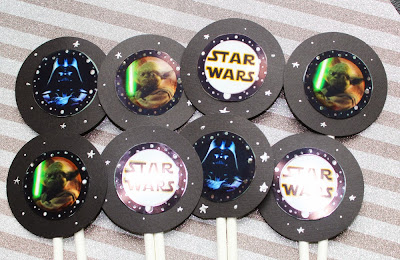
The circle prints were a little smaller than my
circle punch. So I cut circle black card stock, and glued the image on top. I wanted to bedazzle a little, and I used my silver paint and made some stars using a toothpick. In the end I just taped each one in a lollipop stick.

These prints also didn't come out as nice as I wanted, so I also printed again on transparency film. Then I cut and glued on top, being careful about placing glue only to the sides of the pictures. You can see the comparison of the images with regular paper, and the prints with transparency on top of it.

And all of them finished.
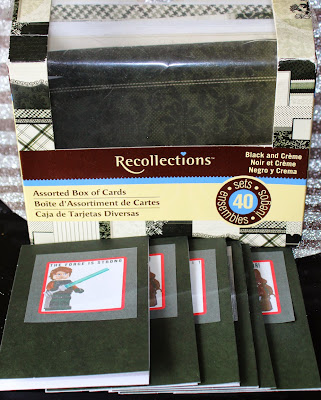
And this set I got from
Sugarstickparties.com. I didn't really know what to do with them, but I saw my box of cards, that I bought a year ago on sale at Michaels, and they were black. Perfect. I cut the cards in half, glued the pictures, and they will be perfect to make labels for the food.

And here is after the printed transparency on top is printed and placed.

I guess if you just print in photo paper for the first time, you'll get this result. Or if you don't want to do double the work, like I did.
I have about 30 days to pull this off, I'll keep posting as I make more decorations. Wish me luck. Now I have to do laundry.
 In a separate sheet, I wrote the date, address, and RSVP info, trying to make like in the movie. The letters I used a ultra fine black sharpie, and the background I painted with black make up.
 I cut them and glued to the invitations.
 For decoration, I made a little Star Trooper in polymer clay, and made the details with a black ultra fine Sharpie.
 I wanted to have a table with more pictures of the characters from the movie. Since I have been painting and drawing, I decided now it is time for my hands to get a break and print some images.
I will highlight all the links for the printables.
I found these great tags at familyshoppingbag.com.
One idea was to use to put in the favor bags. These very inexpensive brown bags were from Michaels.
I wanted to have a table with more pictures of the characters from the movie. Since I have been painting and drawing, I decided now it is time for my hands to get a break and print some images.
I will highlight all the links for the printables.
I found these great tags at familyshoppingbag.com.
One idea was to use to put in the favor bags. These very inexpensive brown bags were from Michaels.
 But I got a little disappointed with the lack of color on those prints, probably because I used regular paper. So then I found in my cabinet this transparency film, to be used in projectors. So I gave it a try, and the prints came out very sharp. I cut them out and with glue on the sides, I placed them on top of the paper prints. They looked much better.

 The circle prints were a little smaller than my circle punch. So I cut circle black card stock, and glued the image on top. I wanted to bedazzle a little, and I used my silver paint and made some stars using a toothpick. In the end I just taped each one in a lollipop stick.
 These prints also didn't come out as nice as I wanted, so I also printed again on transparency film. Then I cut and glued on top, being careful about placing glue only to the sides of the pictures. You can see the comparison of the images with regular paper, and the prints with transparency on top of it.
 And all of them finished.
 And this set I got from Sugarstickparties.com. I didn't really know what to do with them, but I saw my box of cards, that I bought a year ago on sale at Michaels, and they were black. Perfect. I cut the cards in half, glued the pictures, and they will be perfect to make labels for the food.

 And here is after the printed transparency on top is printed and placed.
 I guess if you just print in photo paper for the first time, you'll get this result. Or if you don't want to do double the work, like I did.
I have about 30 days to pull this off, I'll keep posting as I make more decorations. Wish me luck. Now I have to do laundry.
I guess if you just print in photo paper for the first time, you'll get this result. Or if you don't want to do double the work, like I did.
I have about 30 days to pull this off, I'll keep posting as I make more decorations. Wish me luck. Now I have to do laundry.
No comments:
Post a Comment